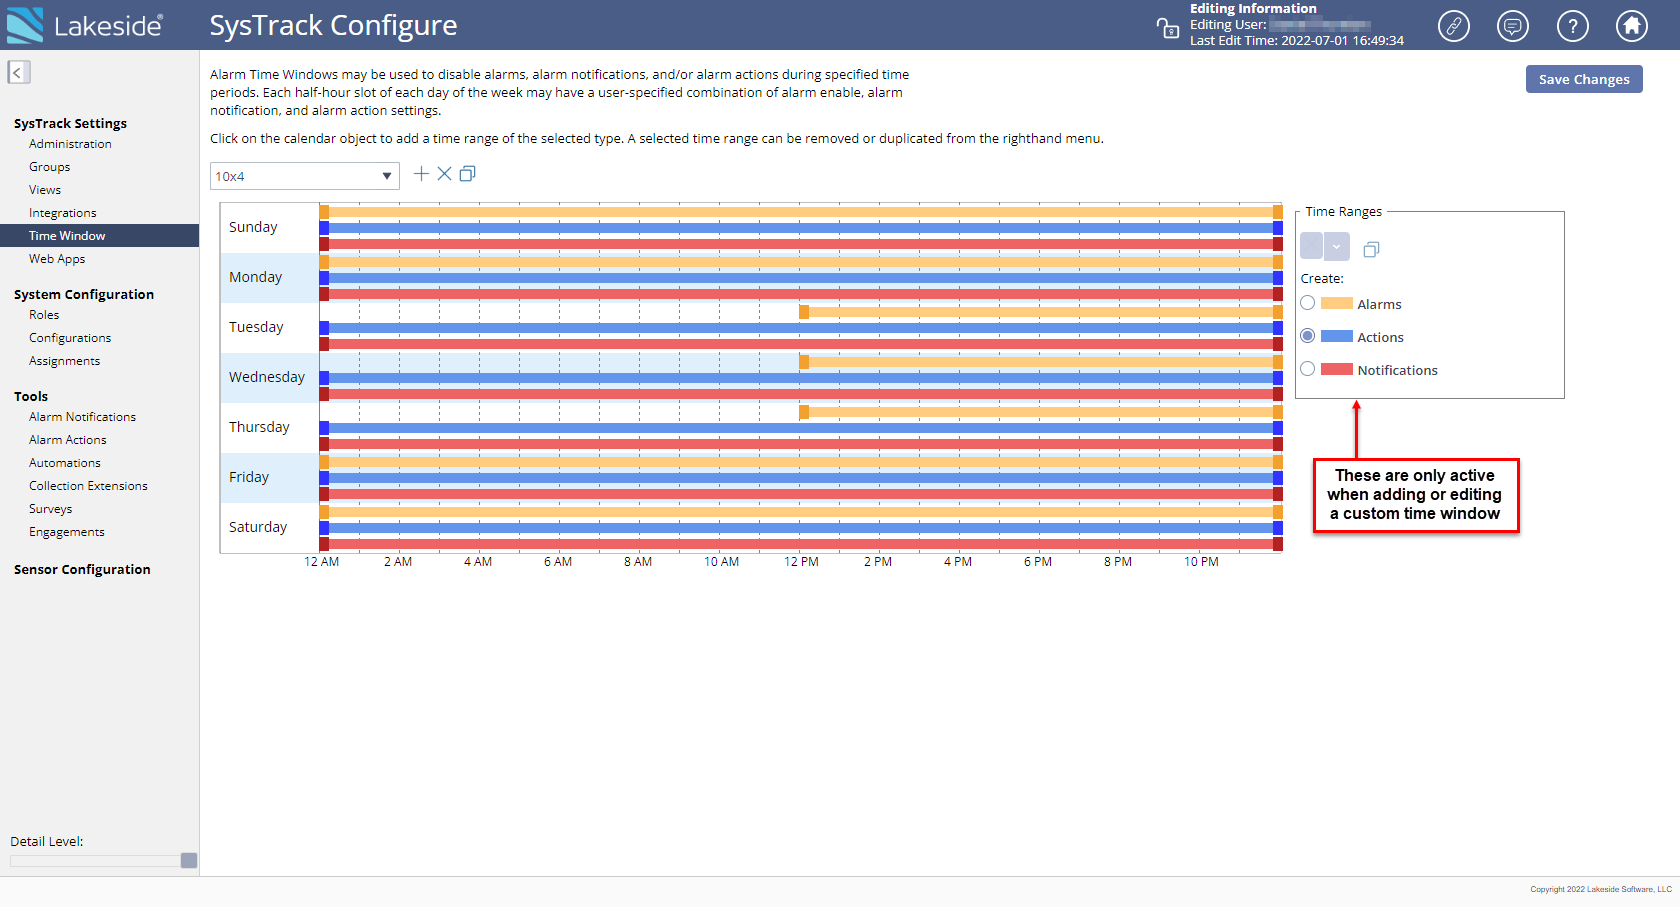
Alarm Time Windows
The SysTrack Agent tracks application usage and user activity 24 hours per day, 7 days per week by default. You can use alarm time windows to disable alarms, alarm actions, and/or alarm notifications during specified time periods. Each half hour slot of each day of the week may have a user-specified combination of alarm enable, alarm notification, and alarm action settings. These time windows can be assigned to Alarms on the Roles page.
SysTrack Configure offers the following preset factory time windows:
- 12x5 (enables notifications/alarms 12 hours a day on five days a week)
- 18x6 (enables notifications/alarms 18 hours a day on six days a week)
- 24x7 (enables notifications/alarms 24 hours a day on 7 days a week)
- Never Run
NOTE: Preset alarm time windows are not editable. Only custom time windows are editable.
The first number in each numerical selection indicates the number of hours per day the alarms, alarm notifications, and alarm actions are enabled, the second number indicates the number of days per week they are enabled.
Add or Edit a Custom Alarm Time Window
-
Click the plus symbol as shown below to display the Create New dialog box. You can optionally click the
 (duplicate) icon to duplicate and then amend an existing time window.
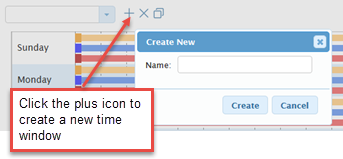
- Enter a Name for the time window and click the Create button. The time window displays initially with 24x7 time settings.
-
Select any bar in the time window to activate the Time Ranges options and enable customization of the window.
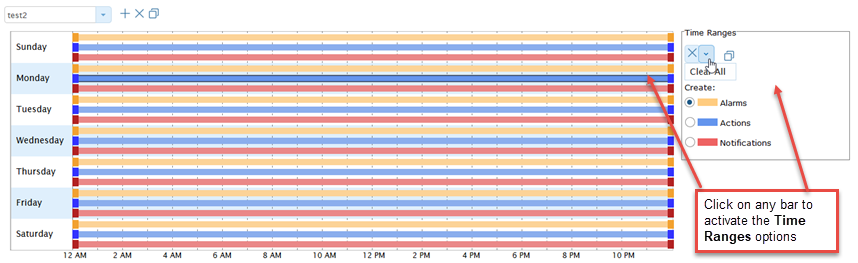
- Use the three radio buttons in the Time Ranges area to customize the newly added alarm time window. The color of the categories in the Time Ranges area corresponds with the colored bars on the chart.
- To delete a selected bar, click the X in the Time Ranges section, or click the down arrow next to the X and select Clear All to clear all the time range bars.
- To add an Alarm, Action, or Notification bar, select the appropriate radio button in the Time Ranges area, and then click on a blank time area in the grid to insert a new time bar.
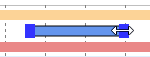
-
Pull and drag either end of the time bar to set the time range as desired.
- When you are done, click the Save Changes button on the top right of the page.
On This Page