Define SysTrack Groups
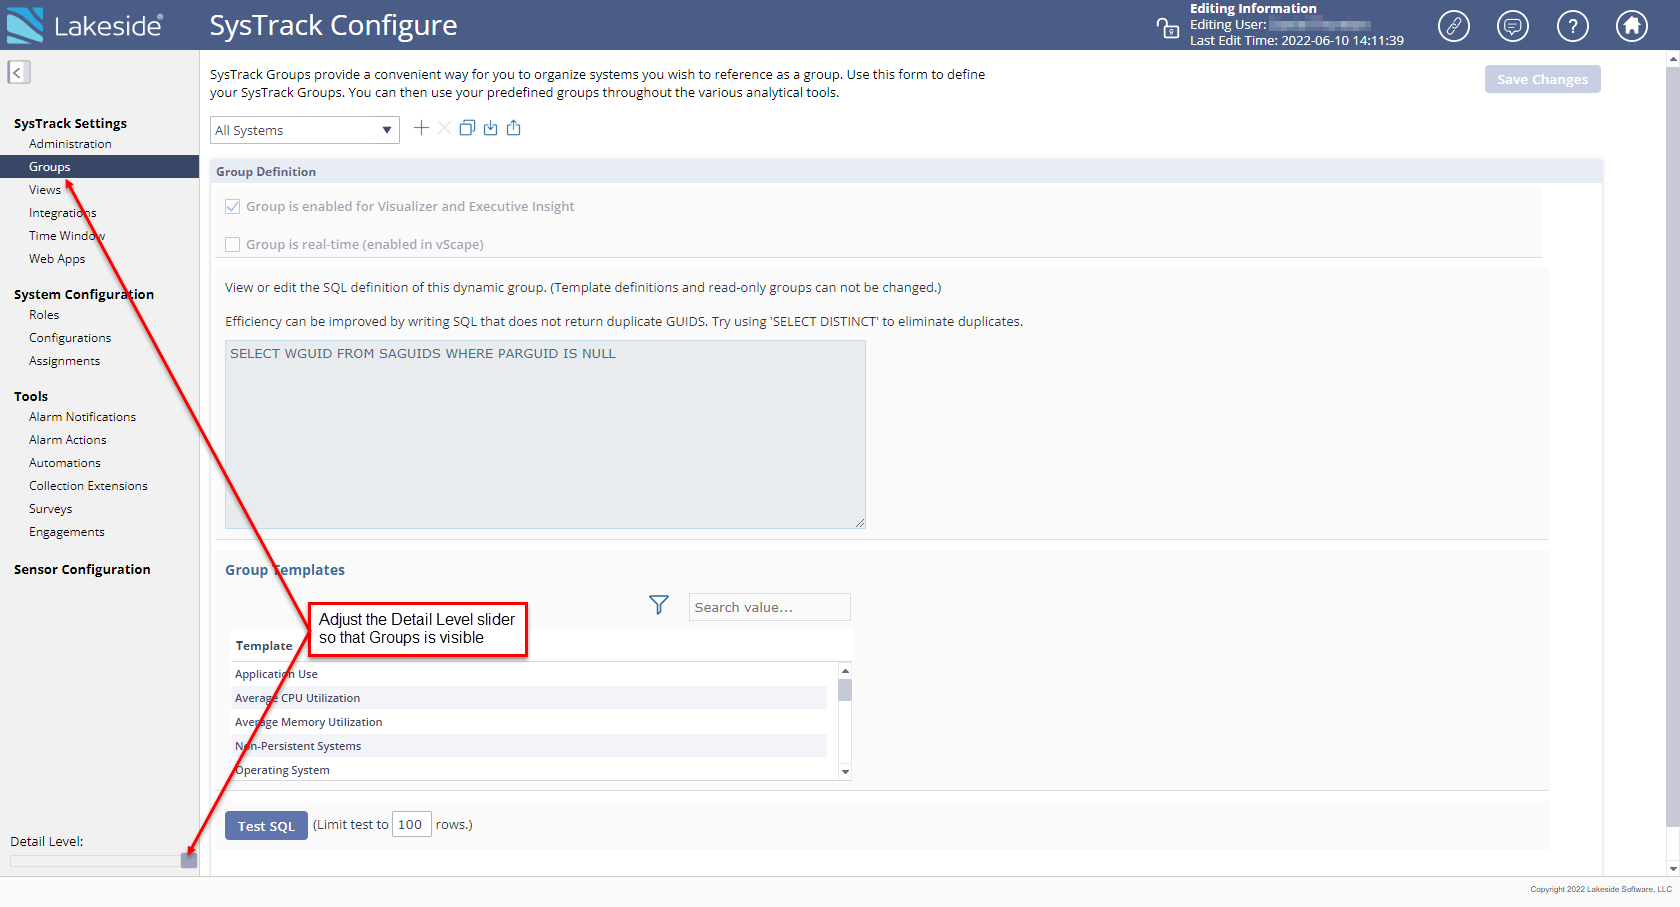
SysTrack Groups provide a convenient way for you to organize systems you wish to reference as a group. After defining a group you can then use it throughout the various analytical tools.
There are two types of SysTrack groups that can be created: Dynamic groups based on a SQL query, and static groups in which we select specific systems.
-
Ensure that the Detail Level slider is set high enough that the Groups category is visible, and click Groups on the navigation pane.
-
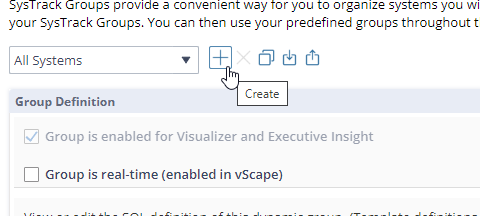
Click the Add Group button.
-
Using the resulting dialog box:
-
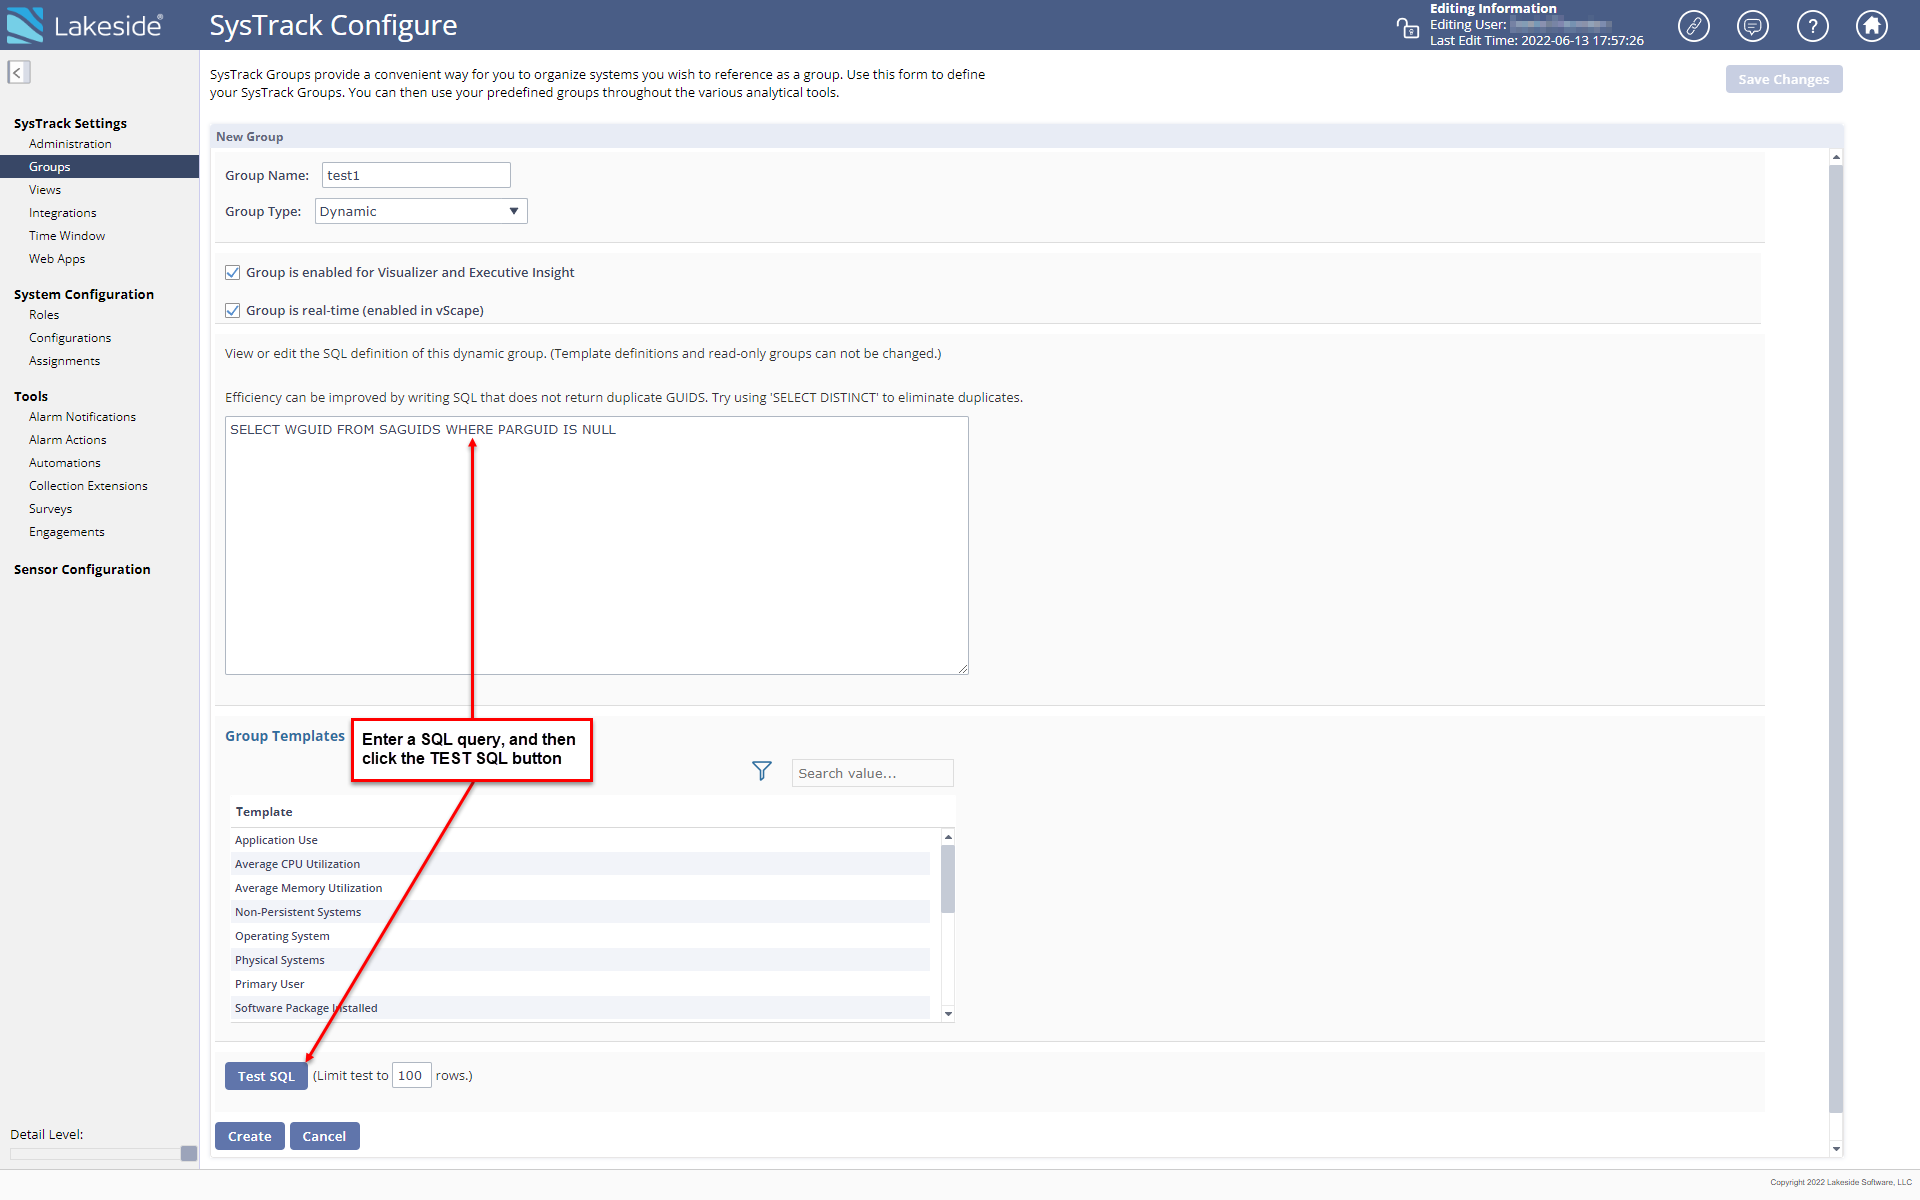
Enter a user-defined name for the new group.
-
Select the group type. A Dynamic Group is a set of systems resulting from a user defined SQL query; the members of the group may vary over time. A Static Group is a group of implicitly specified systems.
NOTE: Group types cannot be changed once they are created.
-
Click OK.
-
-
If you are adding a Dynamic Group:
-
With the Group selected, enter a SQL query in the Group Definition field.
The first example below creates a dynamic group that selects systems using a Windows 10 operating system.
To create rules for specific groups, enter SELECT WGUID FROM [RPT_GROUP_GROUPNAME] where GROUPNAME is the full name, including any spaces, of the desired group. The SQL shown in the second example below will return the All Systems group. Group names can be found in the RPT_Group view as well as on the Configure > Groups page.
NOTE: The Test SQL button will remain inactive if the query is not properly formatted.
-
Enter the maximum number of rows to include in the SQL test (step c) in the Limit test to field. The default number of rows for a test is 100.
-
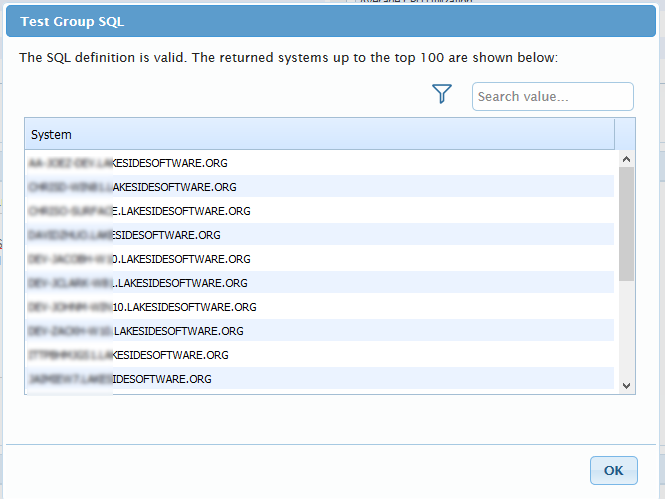
Click theTest SQLbutton. If your query is valid it will return results shown in the example below, and you can click the OK button.
-
If your query does not pass the test because it is not valid, edit the query and repeat the test (steps a and b).
-
If your query is valid, click the Save Changes button in the top right corner.
-
-
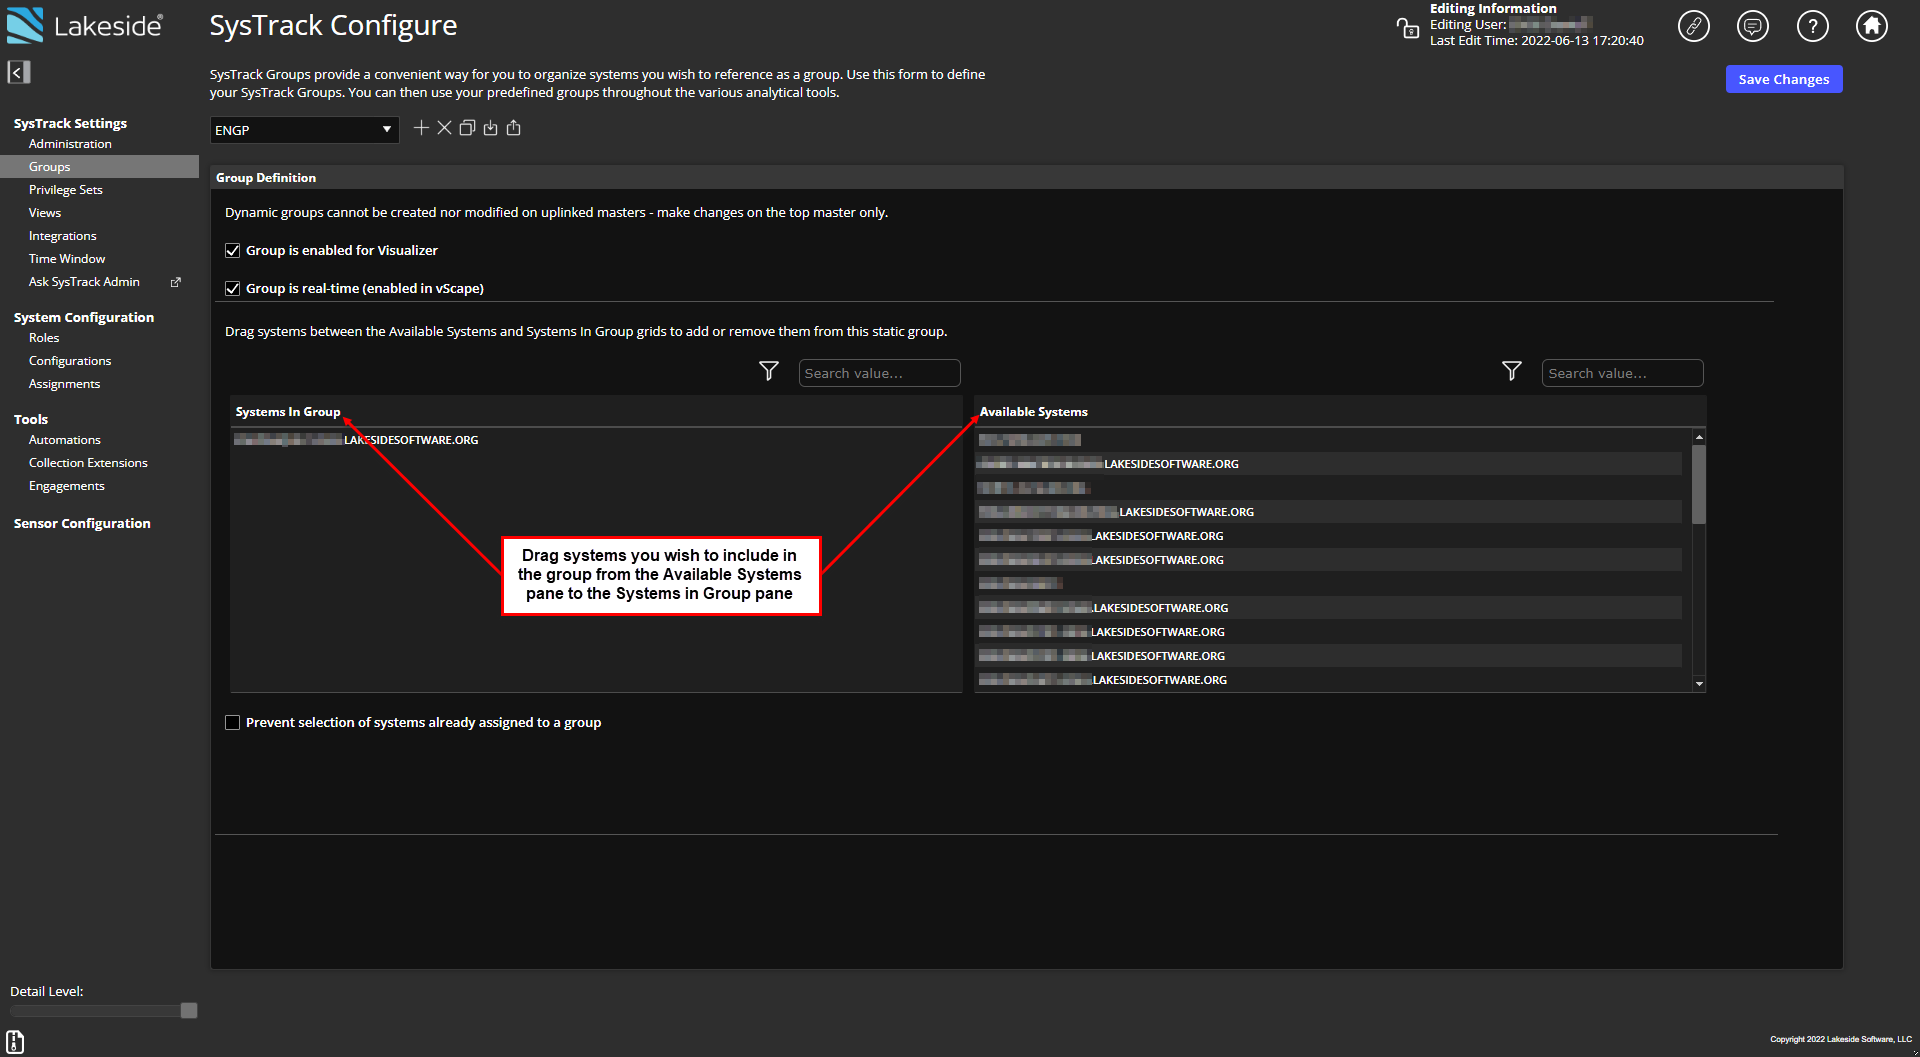
If you are adding a Static Group:
-
With the new Static Groupselected, select and drag the system or systems from the Available Systems pane that you want to include in the group list to the Systems in Group list.
-
Use the Filter icon or the Search value field to narrow the list of systems.
-
-
The check box next to Prevent selection of systems already assigned to a group when selected, will make systems inactive (unselectable) in the Available Systems pane that are already assigned to a group.
-
Click Save Changes to save the Static Group.
On This Page